What This Page is For
The Connect tab is where you link your WordPress site to your OneLence workspace.
This is the required setup step before the plugin can send website activity, business events, or store-related signals to OneLence.
What You Can Do
The Connect tab contains three main areas:
- OneLence account connection
- Manual connection details
- Mark SDK CDN version
Most users only need the first area. The other two are fallback or advanced settings.
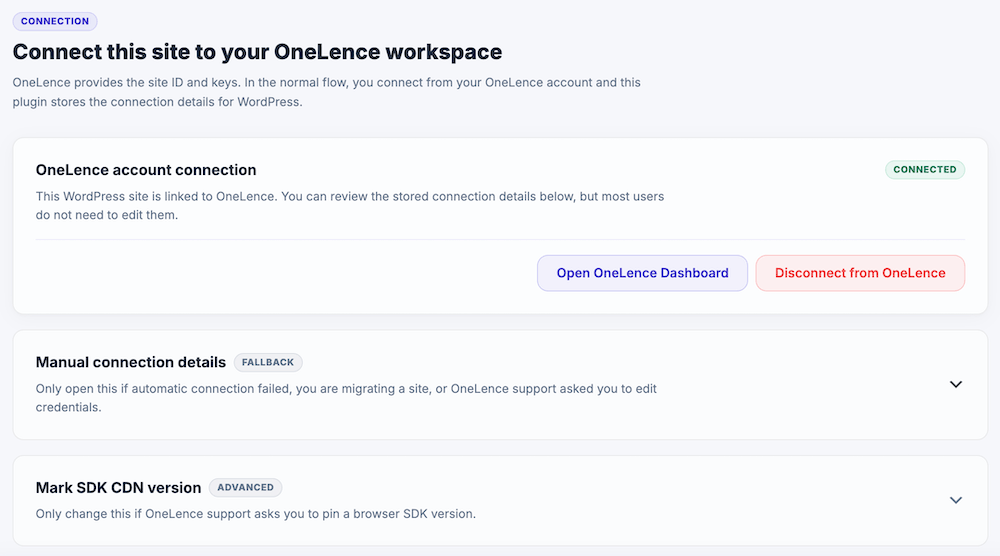
OneLence Account Connection
This is the main connection area.

Use it to:
- connect this WordPress site to OneLence
- open your OneLence dashboard
- disconnect the site from OneLence
Connect this site to OneLence
In WordPress:
- Open the OneLence Connect plugin
- Go to the Connect tab
- Click Connect to OneLence
- Sign in to your OneLence account if you haven't
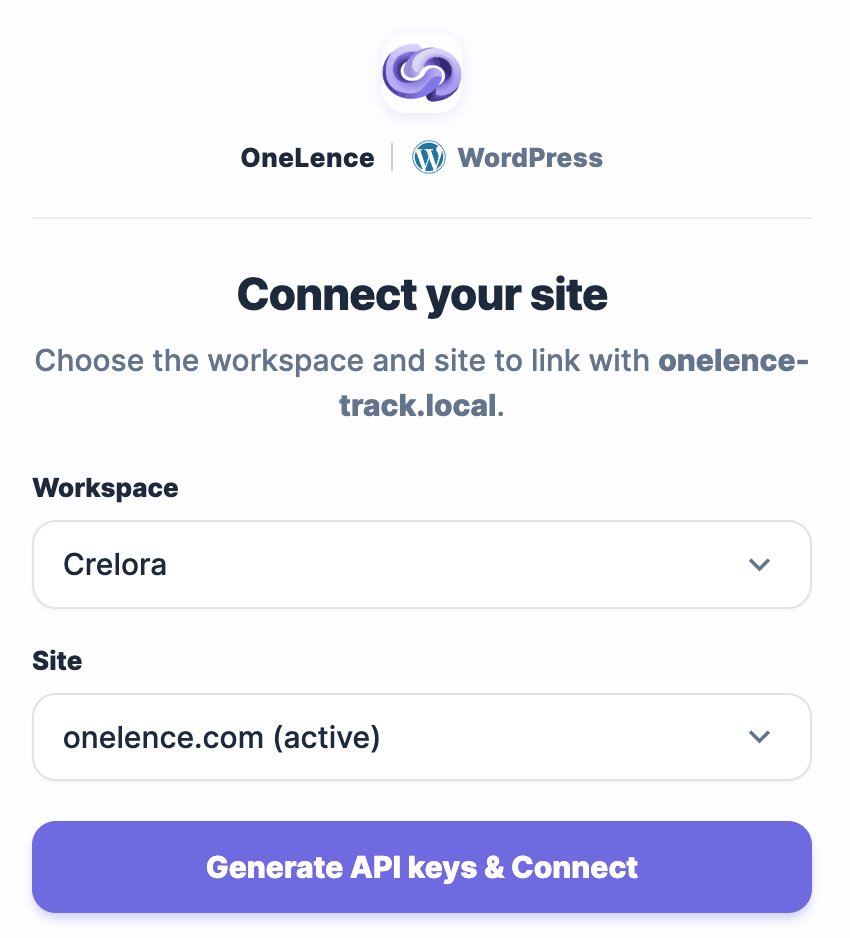
- Select or confirm the OneLence site you want to connect and click Generate API keys & Connect
- You might need to login to your Wordpress admin account again
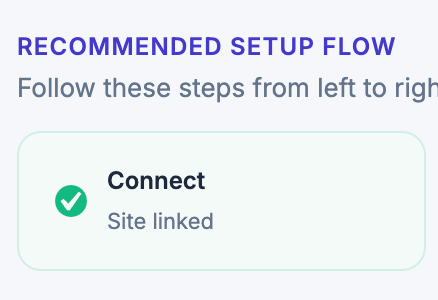
- Once you're connected, you will see the status card is updated to "Connected"
- If not, repeat step 3 to 6 for one more time
Open OneLence Dashboard
Use Open OneLence Dashboard when you want to:
- review your OneLence workspace
- check the connected site
- verify how data appears in OneLence
- continue setup outside WordPress
Disconnect from OneLence
Use Disconnect from OneLence only when this WordPress site should no longer use the current OneLence connection.
Examples:
- you connected the wrong OneLence workspace
- you are moving the site to a different OneLence site
- you want to reconnect the plugin from scratch
After disconnecting, the plugin will no longer use the stored OneLence connection until you connect again.
Manual Connection Details
The Manual connection details section is marked as a fallback for a reason.
Most users should leave this section closed and unchanged.
Why this section is hidden behind a warning
In the normal flow, OneLence should manage these credentials for you through the account connection.
📍 The warning exists because manually changing these values can break the connection between WordPress and the correct OneLence site.
If the values are changed incorrectly, the plugin may:
- send data to the wrong OneLence site
- fail to send events or conversions
- create a mismatch between WordPress and the intended OneLence workspace
When you may need to use it
Only open and edit this area in cases like:
- the automatic connection flow failed
- you are migrating the WordPress site and need to reconnect with updated credentials
- OneLence support explicitly asked you to update a value manually
If none of these cases apply, do not edit these fields.
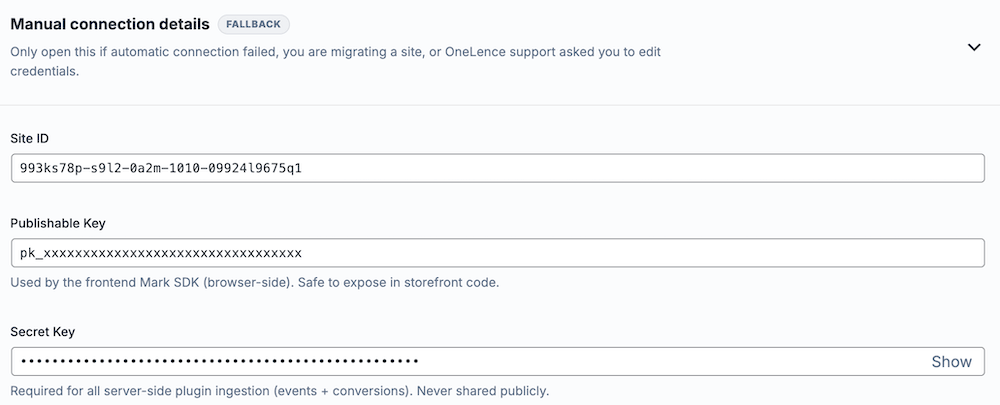
What the fields mean
Site ID
This identifies the OneLence site that this WordPress installation should be connected to.
Only change this when you intentionally want to connect WordPress to a different OneLence site.
Publishable Key
This key is used by the browser-side Mark SDK.
It is safe to expose in storefront code, but it still needs to belong to the correct OneLence site.
Do not replace it with a value from another site or workspace.
Secret Key
This key is required for the server-side plugin ingestion, including events and conversions.
It must stay private and should never be shared publicly.
Do not change it unless the automatic connection failed or OneLence support explicitly told you to update it.
When not to touch these fields at all
Do not edit the manual connection details when:
- the site already shows as Connected
- data is already being sent correctly
- you only want to review settings
- you are not sure which credentials belong to this site
In these situations, leave the stored values as they are.
Mark SDK CDN Version
This section is marked as Advanced.
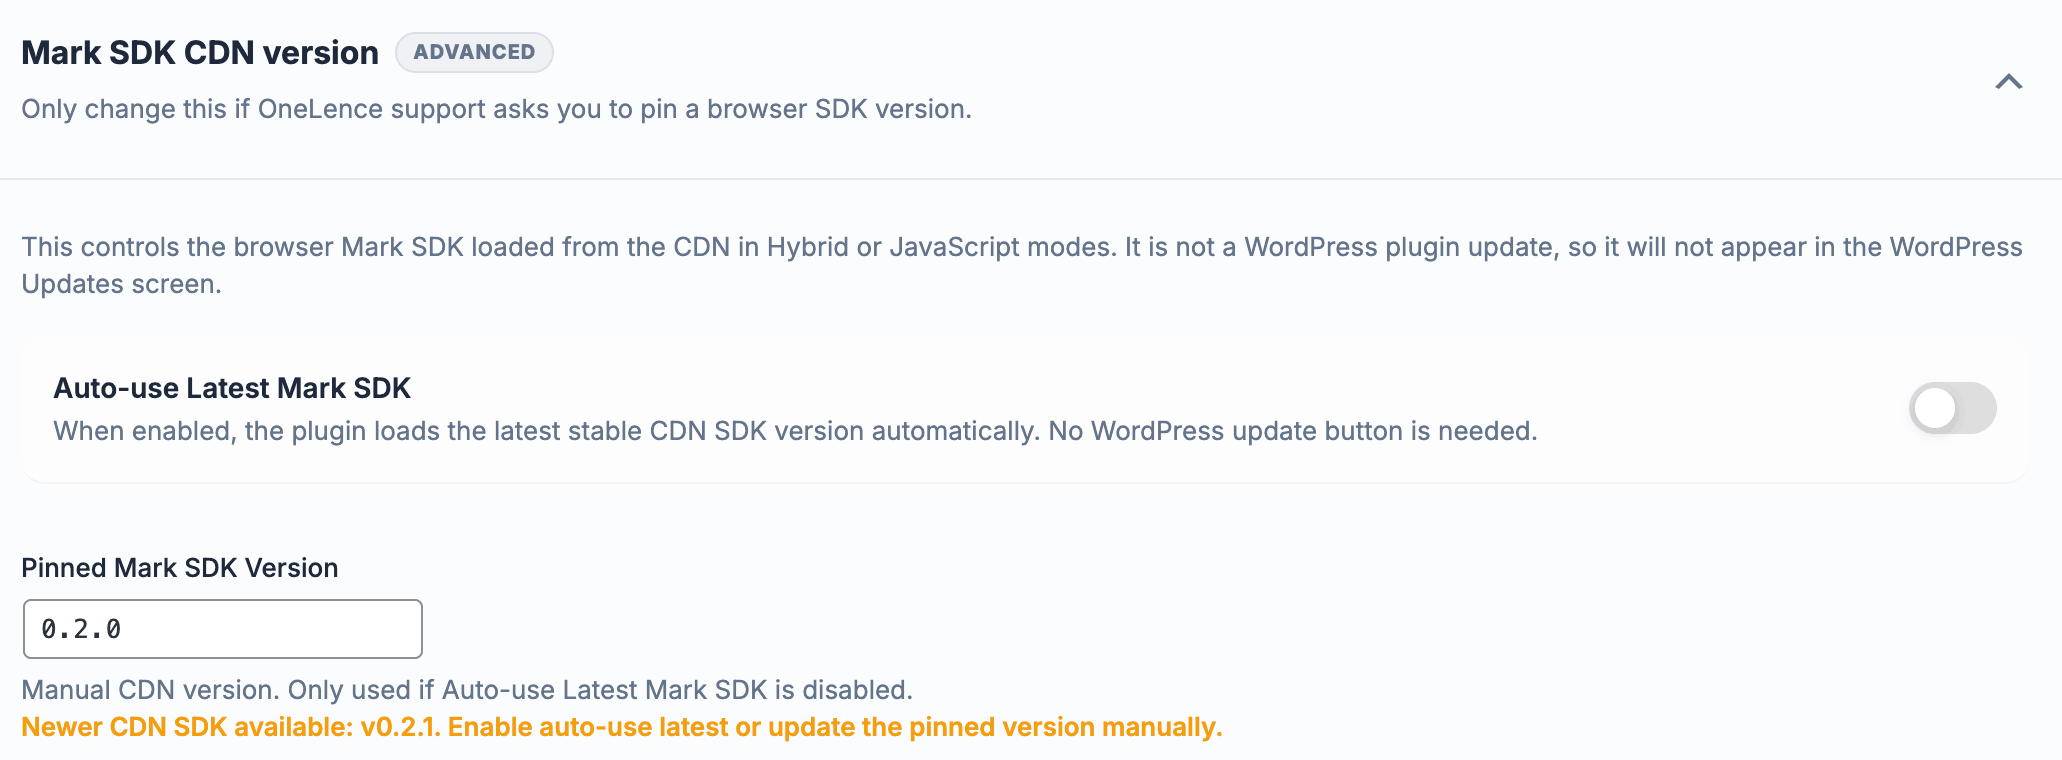
Most users do not need to change anything here.
What this setting controls
This setting controls which browser-side Mark SDK version is loaded from the CDN when the plugin runs in Hybrid or JavaScript mode.
It is not a WordPress plugin update.
That means a newer SDK version shown here will not appear in the normal WordPress updates screen.
Auto-use Latest Mark SDK
When enabled, the plugin automatically uses the latest stable CDN SDK version.
This is the preferred setting unless OneLence support has asked you to pin a specific version.
Pinned Mark SDK Version
When auto-use is disabled, the plugin uses the manually pinned SDK version shown in this field.
Only use a pinned version when:
- OneLence support asked you to stay on a specific version
- you are troubleshooting a browser-side SDK issue
- you need a temporary fixed version for testing
If you do not have a specific reason, leave this area unchanged.
Recommended Use of This Page
For most setups, use the Connect tab like this:
- connect the site through OneLence account connection
- confirm that the site shows as connected
- leave Manual connection details unchanged
- leave Mark SDK CDN version unchanged unless support tells you otherwise
Continue With The Next Setup Steps
After the site is connected, continue with the next parts of the plugin setup: