What This Page Is For
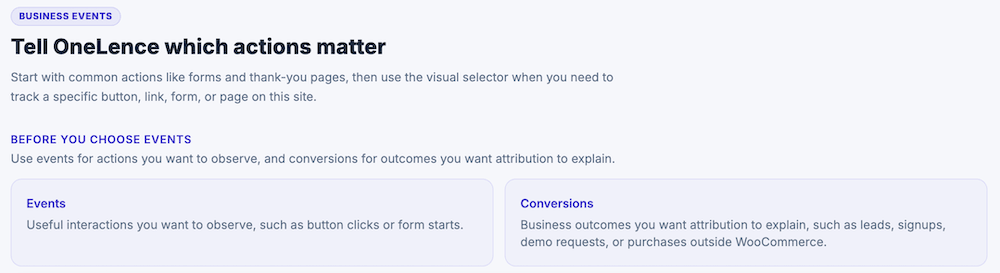
The Business Events tab is where you tell OneLence which actions on your website matter beyond basic attribution.
Use this page to configure:
- common business actions with quick setup
- specific buttons, links, forms, or page areas with the guided picker
- manual interaction rules when you already know the exact selector
- manual business-result rules when you already know the exact URL pattern or target
This page is used after the WordPress site is already connected and the basic tracking setup is working.
Before You Choose Events
This page works with two different concepts:
Events
Events are useful interactions you want to observe.
Examples:
- an important CTA click
- a form submit
- a visitor starting an interaction
- a specific action on a landing page
Conversions
Conversions are business outcomes you want attribution to explain.
Examples:
- a lead confirmation
- a signup
- a demo request
- a thank-you page visit
- a non-WooCommerce purchase outcome
A simple way to think about it:
- use events for actions you want to observe
- use conversions for outcomes you want OneLence to explain in attribution
The Four Parts Of This Page
The Business Events page is built around four practical setup areas:
- Quick setup
- Pick from your site
- Track an interaction manually
- Count a business result manually
Most users should start with the first two and only use the manual sections when they already know the exact target or URL pattern.
Quick Setup
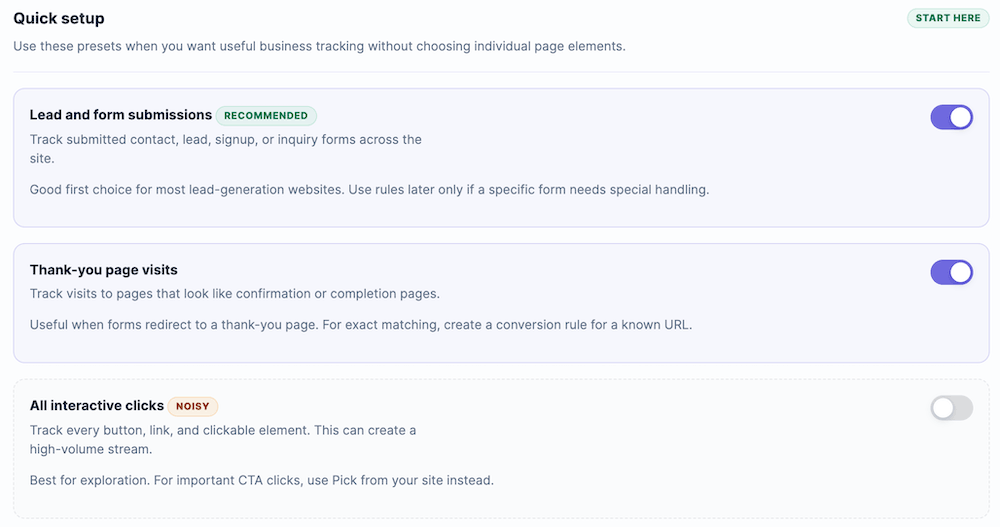
The Quick setup card is the easiest way to turn on common business tracking without selecting specific page elements.
Use this section when you want useful event tracking quickly and do not need exact element-by-element control yet.
Lead and form submissions
This preset tracks submitted contact, lead, signup, or inquiry forms across the site.
Use this when:
- form submissions are an important business action
- you want a simple lead-generation setup
- most forms on the site should count without custom handling
This is usually the best first choice for lead-generation websites.
📍 If one specific form later needs more precise logic, you can keep this enabled and add more exact rules only where needed.
Thank-you page visits
This preset tracks visits to pages that look like confirmation or completion pages.
Use this when:
- forms or flows redirect to a thank-you page
- confirmation pages are a useful signal for completion
- you want a broad setup before adding exact URL rules
This is helpful when the final business outcome is represented by a landing page or thank-you page visit.
📍 If you later need exact matching for one known URL, create a manual conversion rule instead.
All interactive clicks
This preset tracks every button, link, and clickable element.
Use this only when you want a broad exploration view of what people click.
Important note:
- this can create a large amount of data
- many tracked clicks may not be meaningful business signals
- this is best for exploration, not for a clean final setup
📍 For important CTA clicks, the guided picker is usually the better option.
The specificity choice modal
When you turn on a quick-setup option, the plugin may ask how specific the tracking should be.
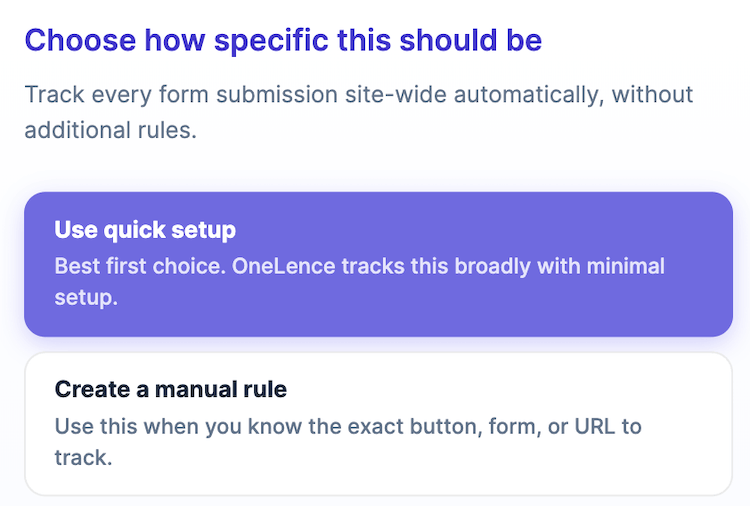
You will see two choices:
Use quick setup
Choose this when broad tracking is good enough and you want the fastest setup.
Create a manual rule
Choose this when you already know the exact button, form, or URL you want to track and do not want a broad site-wide setup.
Pick From Your Site
The Pick from your site section is the guided setup flow.
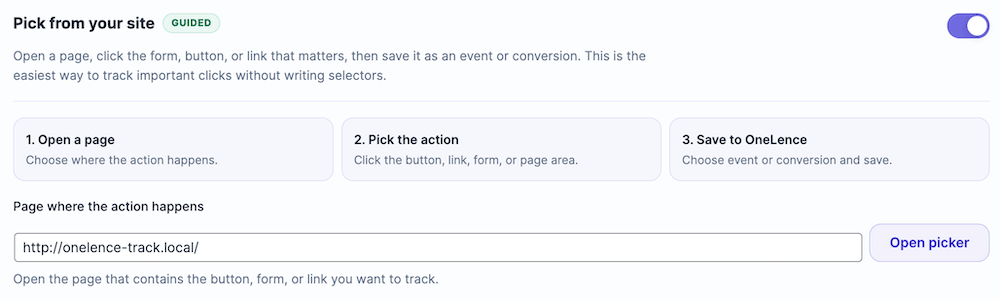
This is the easiest way to track one important click, form, link, or page area without writing selectors manually.
Use this when:
- you know the page where the action happens
- you want to click the real element on the site
- you want help generating the technical match automatically
How the guided picker works
The guided picker follows this flow:
- open the page where the action happens
- click the action on the page
- describe what it means in OneLence
- review where it should apply
- save it to OneLence
This is why the card shows the three steps:
- Open a page
- Pick the action
- Save to OneLence
Open picker
Start by entering or confirming the page URL where the action exists, then click Open picker.
The page should contain the:
- button
- form
- link
- or page area
that you want to track.
The picker panel
After the picker opens, you will see the OneLence overlay panel on the page.
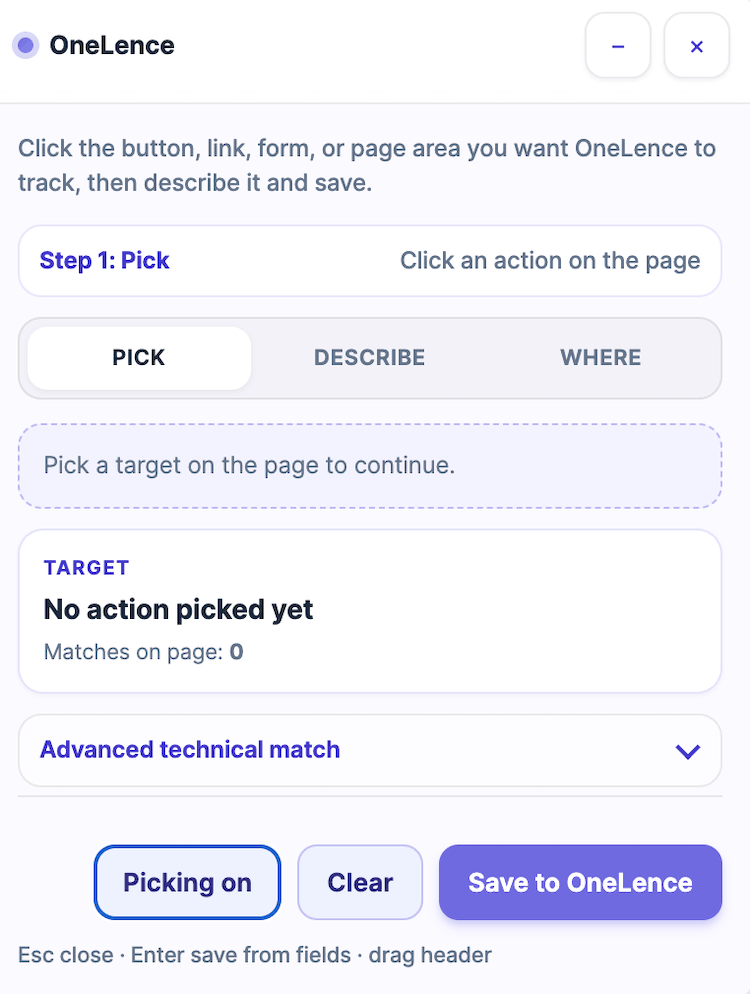
The panel guides you through three tabs:
- Pick
- Describe
- Where
Step 1: Pick
In the Pick step, click the actual target on the page.
At first, the panel shows:
- no action picked yet
- matches on page: 0
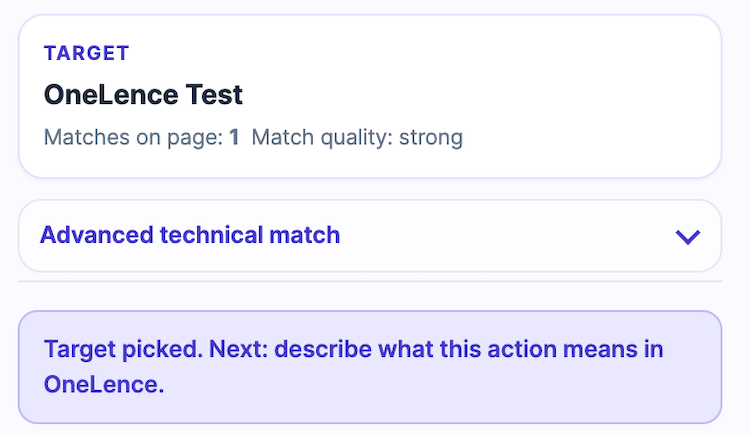
After you click a target, the picker shows:
- the picked target name or label
- how many matches were found on the page
- match quality information
Advanced technical match
The picker also includes an Advanced technical match section.
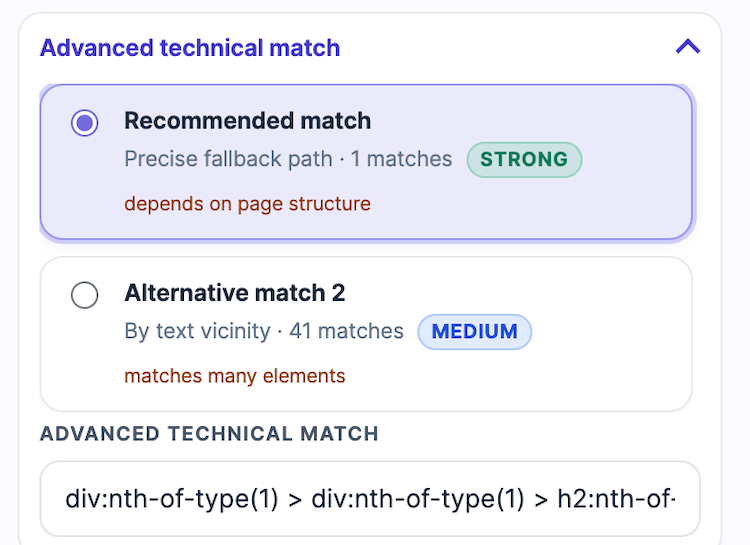
This area shows the technical selector candidates the plugin found for the picked target.
You may see:
- a recommended match
- one or more alternative matches
- a match quality label such as Strong or Medium
- a note explaining tradeoffs such as:
- depends on page structure
- matches many elements
Use this section only if you need to inspect or change the technical selector choice.
In most cases, leave the recommended match selected.
Step 2: Describe
In the Describe step, you define what the picked action means in OneLence.
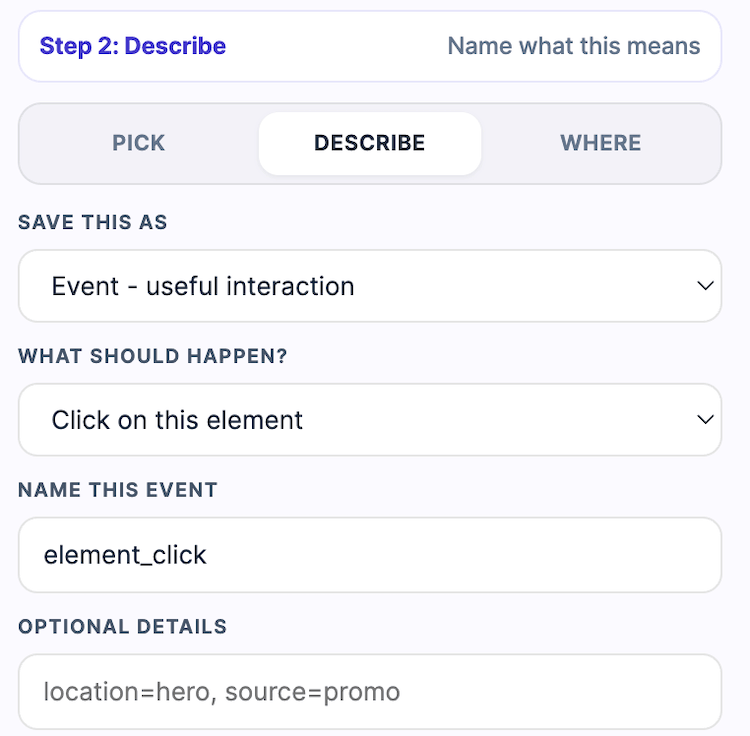
This step includes several fields.
Save this as
This field decides whether the picked action should be stored as an event or as a conversion.
Use event when the picked action is an interaction you want to observe.
Use conversion when the picked action represents a business outcome.
What should happen?
This field describes the kind of interaction OneLence should treat as the trigger.
For example, it may represent a click or another picked interaction type depending on what the picker captured.
Name this event
This is where you name the event.
Use a short and clear internal event name, for example:
pricing_cta_clicknewsletter_submitdemo_request_click
Optional details
This field can be used for additional metadata or internal context.
Only use it if your setup needs extra detail.
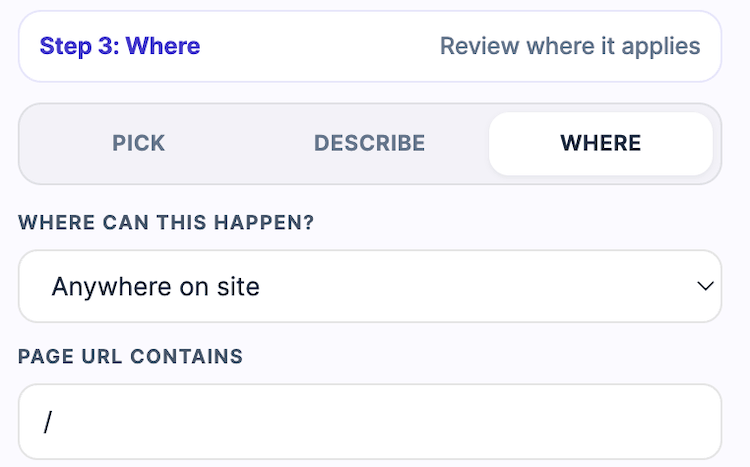
Step 3: Where
In the Where step, you decide where the picked action should apply.
This step includes:
Where can this happen?
Use this to decide whether the action should count:
- Anywhere on site
- or only in a narrower context
Page URL contains
Use this field when the action should only apply on pages whose URL contains a specific path or pattern.
This is useful when the same element or similar element appears in multiple places, but only one page or path should count.
Picker action buttons
At the bottom of the picker panel, you will see the action buttons.

Picking on / Pick another
This keeps the picker active so you can select another target.
Use this when the current target is not the one you want.
Clear
This removes the current picked target from the current picker flow.
Use this when you want to restart the current selection.
Save to OneLence
This saves the current setup after you have finished the picker flow.
Use this only after the target, meaning, and scope are all correct.
Track an Interaction Manually
This section is for manual event rules.
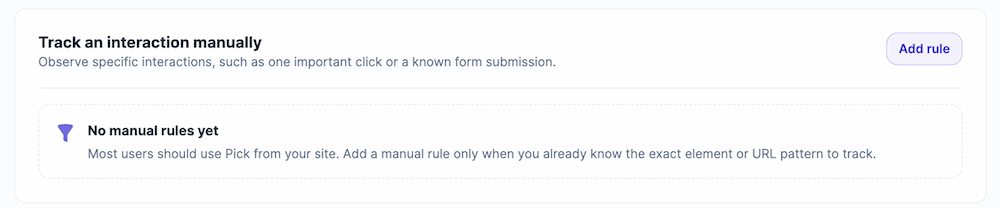
Use it when you already know the exact element or selector to track and do not want to use the guided picker.
Examples:
- one specific CTA button
- a known form submission target
- one exact interaction with a known element
When to use manual interaction rules
Use this section when:
- you are migrating an existing setup
- you already know the selector
- the guided picker is not the best option for this case
- OneLence support asked you to create a precise rule
If you do not already know the technical match, use Pick from your site instead.
Empty state
If no manual interaction rules exist yet, the section shows a No manual rules yet state.
This is normal until you add the first rule.
Existing interaction rules
Once rules exist, they appear as editable rule cards.

A rule card shows:
- whether the rule is on or off
- the trigger type, such as click or form submit
- whether it is site-wide or URL-filtered
- the selector or target summary
- edit and remove actions
Add manual event rule
When you click Add rule, the event-rule modal opens.
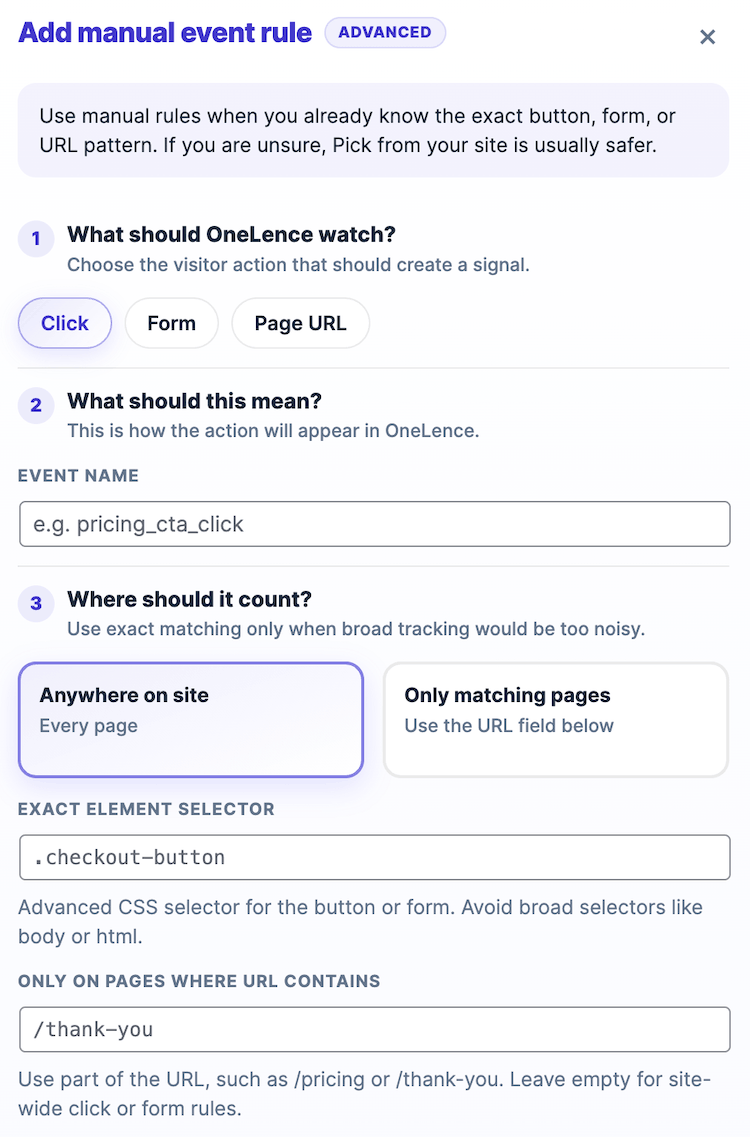
This modal is advanced and follows three sections:
1. What should OneLence watch?
Choose the visitor action type:
- Click
- Form
- Page URL
2. What should this mean?
For manual event rules, this is the Event name field.
Use a short event name such as:
pricing_cta_clicknewsletter_submithero_demo_click
3. Where should it count?
This decides where the rule should apply.
Options include:
- Anywhere on site
- Only matching pages
Then you can define:
- Exact element selector
- Only on pages where URL contains
Use manual event rules only when you already know the exact button, form, or URL pattern.
Count a Business Result Manually
This section is for manual conversion rules.
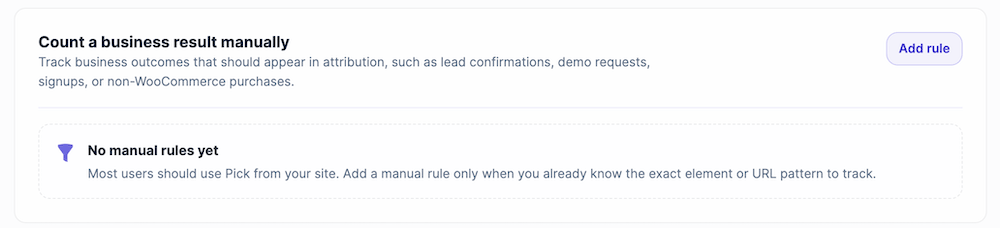
Use it when you want to define a business outcome precisely and you already know the exact target or URL pattern.
Examples:
- a lead confirmation action
- a signup result
- a demo request completion
- a thank-you page URL
- a non-WooCommerce purchase result
When to use manual conversion rules
Use this section when:
- attribution should explain the final outcome
- a broad preset is not specific enough
- you know the exact target or URL pattern
- the business result should be treated as a conversion, not only an event
Empty state
If no manual conversion rules exist yet, the section shows a No manual rules yet state.
This is normal until you add the first rule.
Add manual conversion rule
When you click Add rule, the conversion-rule modal opens.
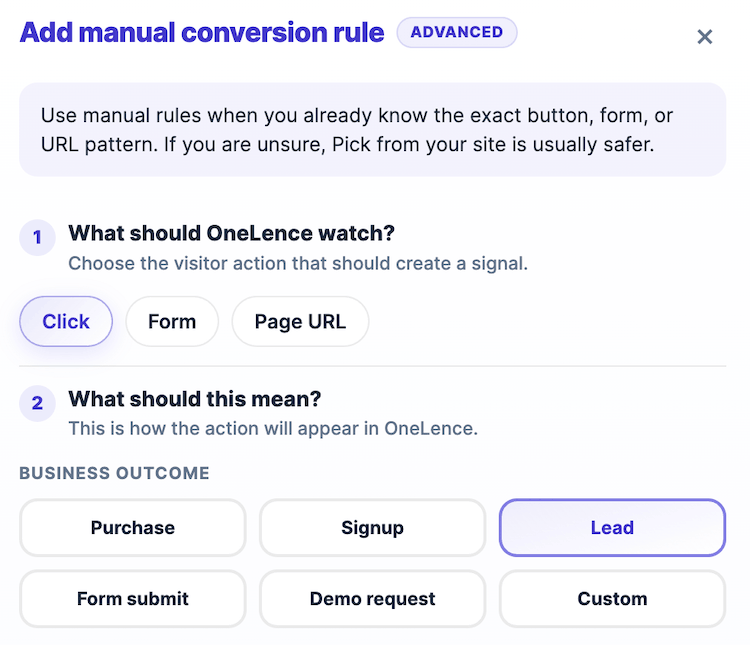
This modal follows the same advanced three-step structure, but the meaning section is different.
1. What should OneLence watch?
Choose the trigger type:
- Click
- Form
- Page URL
2. What should this mean?
For conversion rules, this becomes Business outcome.
Available outcomes include:
- Purchase
- Signup
- Lead
- Form submit
- Demo request
- Custom
Use Custom when none of the standard options match your business result.
3. Where should it count?
This controls where the conversion rule applies:
- anywhere on site
- or only on matching pages
Then you can define:
- the exact selector if needed
- the URL pattern if needed
Interaction rules vs business-result rules
A simple way to separate the two manual sections:
- use Track an interaction manually when the action itself is what you want to observe
- use Count a business result manually when the action represents a meaningful outcome for attribution
Recommended Way To Use This Page
For most websites, the easiest order is:
- start with Quick setup
- use Pick from your site for important buttons, forms, or links
- use Track an interaction manually only for known precise interaction rules
- use Count a business result manually only for known precise conversion rules
Practical Guidance
Good first choices
For many websites, a strong starting point is:
- turn on Lead and form submissions
- turn on Thank-you page visits when your flow uses confirmation pages
- leave All interactive clicks off unless you are exploring
- use the guided picker for one important CTA or form
- add manual rules only when exact control is necessary
When to prefer quick setup
Prefer quick setup when:
- you want a fast and broad setup
- the business signal is common across the site
- you do not need exact element matching yet
When to prefer the guided picker
Prefer Pick from your site when:
- one specific button or form matters
- you want more precision without writing selectors manually
- you can open the actual page and click the target
When to prefer manual rules
Prefer manual rules when:
- you already know the exact selector or URL pattern
- you are migrating from an older tracking setup
- support asked you to configure a precise rule
- the guided picker is not suitable for that target
Continue With The Next Setup Steps
After business events are configured, continue with: